There is a sense of adventure and fun in snowboarding that simply cannot be replicated in any other sport. Perhaps it is the thrill of gliding down snow slopes or maybe it is just the idea of defying winter and enjoying all it brings. Either way, it is an exciting experience worth trying at least once in your lifetime.
That said, for you to get the most out of it, you need to be well-prepared for a snowboarding experience. More so if you are a first-timer. It may seem rather easy as you watch others do it but it takes some skill to be able to do it effortlessly.
So, before you don your best snowboard goggles and hit the trail, here are some essential snowboarding preparation tips.
It is normal to feel both excited and intimated about your first try on the pistes. The best way to get around that is to plan for it. If you know and have everything that you need, you are likely to be comfortable and confident enough to excel. Let’s look at some basics to have on your plan.
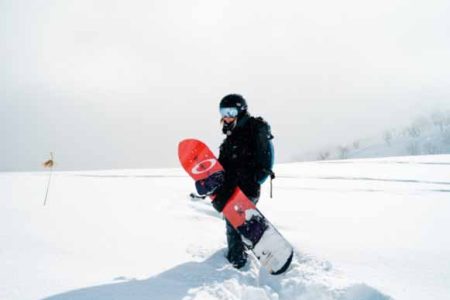
Snowboarding gear determines the quality of your snowboarding adventure and more importantly your safety out on the snow. However, while you may feel tempted to invest and get a set of your own, consider renting gear for your first few times. This will give you a chance to try out different kinds of equipment and learn what you are most comfortable with. That way, when you get around to buying, you will invest in a set of gear that you are certain will last you a while.
A set of snowboarding gear includes:
A snowboard is a flat streamlined plank that helps you to glide on the snow. They come in different sizes and curves but can be classed into 3 main types; all-mountain, freestyle, and alpine. The all-mountain type is versatile and works on all kinds of snow terrain hence it would be perfect for a first-timer. The flexible freestyle snowboard is best for short runs and stunts while an alpine snowboard is ideal if you are riding downhill or carving.
Bindings are somewhat like boot templates affixed on the snowboard. When you slip your boot-clad feet into them, they keep your feet secured onto the snowboard for safe riding. Bindings are generally compatible with most snowboarding boots but you need to ensure that they are comfortable and have the right flex. Flexing here means that they can bend enough to accommodate your feet’s movement on the snow.


Snowboard boots should be well-insulated and fit comfortably. If the fit is off it may cause your foot movements to go wrong due to discomfort. Like the bindings, boot flex is also an important aspect to consider. Since you will likely start with an all-mountain snowboard, aim for boots with a soft to medium flex. You can always adjust as your skill levels advance.
Given the cold up in the mountains, you would reckon heavy socks are best, right? Wrong. Snow boots come well-insulated to trap your body heat and keep your feet from freezing so heavy socks would be overkill. Go for socks made of synthetic or merino wool. They are breathable fabrics that will keep your feet sweat-free and give you better stability and comfort as you ride.


Going snowboarding with a poor choice of gloves puts you at risk for frostbite. As such, you will need properly-insulated gloves that fit well enough to cover your entire hand and allow you to flex your fingers. The exterior of the gloves should also be clad in a waterproof material to keep your hands dry. A slip-resistant design on the fingers and palms to give you a better grip would equally be a plus.
Not to scare you off the trails but you will likely fall a couple of times as you learn. It is nothing to be ashamed of, it happens even to pros. The trick is to ensure that sensitive parts of your body, like your head, are protected from injury. A good helmet should be fully padded on the inside and have a chin strap to hold it in place. Try on a few at the rental until you find one that fits comfortably and is compatible with snowboarding goggles.


Light intensity, Ultraviolet ray exposure, and snow debris are all snowboarding challenges that could obstruct your sight. This is why snowboarding goggles are extremely important. They keep your eyes protected throughout your snow ride.
Your ideal choice of snowboard goggles will depend mostly on the conditions you are snowboarding in. Foggy days, for example, will call for anti-fog snowboard goggles while night-time tries may require clear night snowboarding goggles.
Given how personal sigh preferences and needs are, it would be best to buy your own pair of snowboard goggles. Further, if you have special requirements, it is advisable to look out for snowboard goggles companies that offer customization services. This would be particularly helpful if you wear prescription lenses and need lens inserts or fitted OTG snowboard goggles.
Snowboarding clothing is worn in layers as opposed to one-off heavy pieces. Therefore, you will only need a jacket and pants that are lightly insulated on the inside to complement the thermal wear you will have underneath them. Additionally, they should both be made of waterproof material on the outside to ensure you stay dry at all times. Good pants designs can also be tightened at the bottom to ensure that no snow gets into your boots or pants.

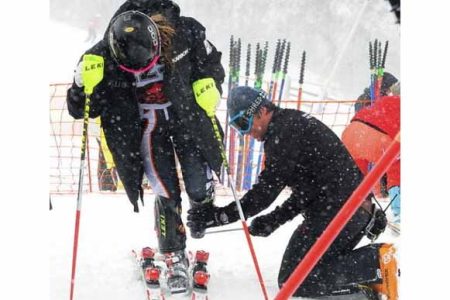
For your sake and the sake of others on the snow trails, sign up for classes before you make your first attempt. You will have a safer and more fun experience if you understand how to navigate the course. Plus, once you have mastered the basics, you can snowboard more independently and explore more pistes.
It is advisable to choose lessons with a few learners. You will likely learn and get better guidance when the instructor has a smaller pool of people to manage and teach. Moreover, the fewer you are on the slopes, the easier it is to observe others, self-correct, and improve.

Even in the holiday season, the pistes attract smaller crowds during weekdays. Such days would be a golden opportunity to go for training lessons or make your first try. You would not have to worry about ramming into anyone and if you are anxious about embarrassing falls, there will be less of an audience.
A thinner weekday crowd also presents benefits such as:
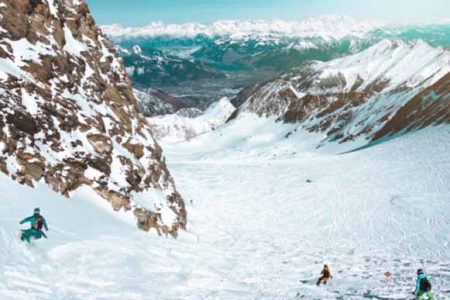
When you have gathered all your gear and learned the basics, it will finally be time to explore the snow trails. Purpose to enjoy yourself and put your lessons to practice. Soon you will be carving like a snowboarding athlete. Nevertheless, here are some tips on coping with the bunny slope and other trails.

Snowboarding requires you to be nimble so as to navigate the snow with ease. Ironically, your body muscles often tense up in the cold. So, how do you fix this? Warm-up exercises.
The goal of warm-up exercises is to stretch your muscles and get blood flowing through them so that they are warm and flexible. This makes your muscles more attuned to move with ease when you finally start to snowboard as opposed to going in stiff. Some warm-up exercises you could try include:
Lunges- standing upright with your feet parallel to each other, bend your knees half-way then stretch one leg behind you. Avoid locking the bended knee as it would cause discomfort. Repeat while alternating sides.
Standing quad stretches- standing upright with your feet together, lift your left leg backward from the knee up. Hold it in using your left hand and stretch the leg as far as is comfortable. Switch legs and repeat. You can stretch the opposite arm out or hold onto a surface to help you balance.
Shoulder stretches- stretch your arms out and take a deep breath. Breathe out and lift your left arm to touch as far down your back as possible. Switch hands and repeat while breathing to open up your airway and lungs.
Back stretches – standing upright with your feet parallel and apart, bend to one side and touch your foot. Hold position. Switch sides and repeat while taking deep breaths in between. Roll your shoulders when done.
To ensure you are comfortable on the snowboard and that the whole set up including boots and bindings fit right, you could try:
A tail press- standing in position on the snowboard, lean your weight towards the tail side and balance. This will give you a sense of how turning will feel and whether your gear setup is okay.
A nose press- this is the same as the tail press aside from the fact that you should lean your weight on the nose side.
The penguin walk – apply pressure on your toe edge and try to walk forward. This will teach you how to break imminent falls. On your walk balk, apply pressure on the heel to get a feel of how to find balance on your snowboard and navigate flat stretches.

When you are planning a hiking trip, water often comes up at the top of your list. Well, this might shock you but the same should apply when you are planning for a day out in the snow. Much like hiking, snowboarding is a full-body sport that will have you sweating through your clothes. As a result, your body will be losing water and this could make you dehydrated which is quite dangerous.
In addition, to make up for all the body heat you will be losing, your body works overtime to supply nutrients and keep up metabolism. Water is one of the main mediums of nutrient transport in your body. When there is not enough of it in your system, you may experience stitches, fatigue, and dehydration headaches.
A small snowboarding backpack would be an easy way to carry drinking water up the mountain.
You can package the water in either:
A water bottle- there are many versions of water bottles recommended for the snow so it is really a question of preferences and budget. However, it is advisable to choose a lightweight bottle that can keep your water from icing up. A collapsible bottle, for instance, is less rigid and can fit well in a small back. They are also made of poor conductors so the water will likely stay liquid.
A hydration pack – these are bag-like water packs that come with a pipe. You would fill the pack with water, connect the small pipe, and then place the pack in your bag. Whenever you get thirsty, you would simply drink using the pipe. It is very convenient if the pack is reliable enough not to burst on you and if the pipe can go without freezing.
Remember to always refill your water at pit stops. If at all possible, limit your caffeine and alcohol intake during your snowboarding trip as they are both dehydrating.

Ski lifts work by scooping you up and gently dropping you off. They are used when you need to ascend a particularly steep slope from which you can then snowboard downwards. Most people have a hard time with them because you have to navigate on and off them with a snowboard on.
There is no full-proof method on how to navigate ski lifts because they vary slightly from one resort to the next. Nevertheless, given as the concept is largely the same, the following are some guidelines that you can follow when taking a ski lift.
Briefly practice using one foot to start and stop your snowboard.
Untie one foot from the binding on the snowboard and leave the other, preferably the lead foot, fastened on.
Skate to the ski lift pickup point and stand facing forward but watch for the oncoming ski lift chair.
When the chair gets to you, place your weight on one foot, and swivel into the seat.
Bring the safety bar down when airborne.
As you approach landing, ensure the nose of the snowboard is facing the direction you are heading to.
Lift the safety bar as you near the ground.
Hop off and skate forward until you are off the ski lift’s path.
Fasten the free foot into the binding to resume snowboarding.
Ski lifts have a stoppage mechanism that can be engaged in the event of mishaps so do not be afraid to take them. If you are afraid of heights, avoid looking downwards until you begin descending.
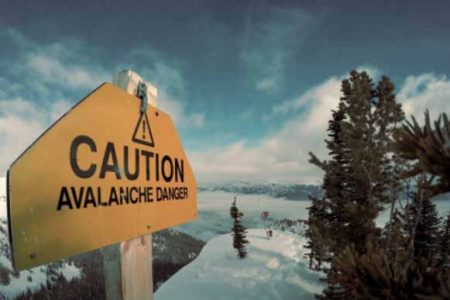
In any sport, there are risks that you need to be wary of. This is equally true when it comes to snowboarding. To avoid them, it is best that you appraise yourself of the various issues you might face and how to handle them.

You will be hard-pressed to find a snowboarder who has not taken a spill on the snow. This goes to say that at some point you should expect a tumble of your own. For this reason, endeavor to learn not just how to prevent falls but also how to fall safely when it is inevitable.
Unless it is a completely unexpected fall, you are likely to feel what side you are going to fall on. Hint: this would be the direction you feel the force of gravity pulling you to. In response, you can safely try to:
Fall forward- as opposed to falling flat with a full-body impact, stretch your hands towards the snow as you fall. Immediately they touch the ground, shift the weight to your forearms. The first step will lessen the impact on your body as your wrists will be supporting you. By shifting onto your forearms, you take the pressure off your wrists to a stronger part of your arms that can stop you from sliding further.
Fall backward- the goal of falling backward safely is to avoid whiplash and hitting your tailbone which can be quite painful. When you feel gravity pulling you backward, you will likely fall on your bum. Slide onto your back to spread the impact and lift your legs so that your snowboard is in the air and does not complicate your fall.
Steer away from others – if at all possible, try and steer away from others or warn them verbally to get out of the way. Ramming into another person would make both of you into a heavy load which would increase the speed and impact at which you both fall.
Proper gear will also make a significant difference in how safely you fall. Clothing layers, a helmet, and snowboard goggles will all serve to protect you when you fall. If you would like extra protection, you can consider investing in options such as padded snow pants.

White snow makes for a highly reflective surface. Due to this, if you are snowboarding without snowboard goggles, when ultraviolet rays hit the snow, they are reflected right into your eye. The UV rays then burn your cornea in the same way that they would inflict a sunburn on your skin.
Some symptoms of snow blindness include:
Pain in the eyes
Blurred or no vision
An intense headache radiating in the temples and forehead area
On the bright side, this is something you can easily avoid by wearing snowboarding goggles when you are out in the snow. Do not fall for the common misconception that there are no UV rays on a cold day, nothing could be further from the truth. Heat and light intensity may differ but UV rays are always present.
When shopping for snowboard goggles, ensure that they are designed to protect your eyes against UV rays. Aim for designs such as photochromic snowboard goggles that filter out light rays by tinting into darker or lighter shades as light conditions change. An anti-glare feature would also be a useful addition. Fortunately, snowboard goggles are customizable and can have multiple features.

There are different kinds of pain that you may experience during or after a snowboarding session. Some are minor and avoidable while others may require medical attention and a break from snowboarding.
Avoidable pains stem from:
Skipping the warm-up session– if you leave the resort and go straight into snowboarding, your muscles will be stiff and unprepared. As a result, you will be flexing tense muscles out on the snow which you will pay for during and after your session. It will likely present as fatigue, muscle-pulls, and muscle soreness.
Skipping the warm-down session- when you get back from your day out snowboarding, a warm-down session is essential before you hit the shower. It entails slow relaxing stretches to unclench any tense muscles and get your heart back down from all the adrenalin. When you are done, you can finally have a warm shower and relax.
Ill-fitting gear – overly tight boots, a tight helmet, and pinching snowboard goggles are some examples of gear issues that could ruin your day. At first, they may seem minor but after suffering through the day, you start to realize how important proper fitting is. That said, instead of playing through the pain, you would be better off returning to the resort the moment you first detect discomfort. It is better to lose time on a change than risk or exacerbate an injury.
On the flip side, there are unfortunate unrelenting pains and serious injuries that occur on the pistes. They include sprains, breaking a limb, fainting, and concussions. They are usually unavoidable as should be treated with utmost urgency. With this in mind, be keen to find out what the medical rescue services and policies are before checking into a ski resort.

Aches and slight pains are normal and to be expected. Even those that have grown up on the snow have the occasional backache after a day of adventure. In terms of remedies, you can explore:
Massages– warm massage oil infused with eucalyptus oil would go a long way in relieving muscle pain. It would undo kinks in your muscles, restore blood flow, and get you back to feeling rejuvenated. This would be especially beneficial if you are doing back to back days of snowboarding.
Hot showers/baths, steaming- warmth causes your body muscles to relax. This increases blood flow and eases any built-up tension. After a session, give your body time to acclimatize to indoor temperatures and then get into a warm bath, shower, or sauna.
Pain medication could help you soothe aches and pains too but it is best that you consult a medical expert on what to take. Some people’s body chemistry gets affected by high altitudes, strenuous activity, and cold temperatures. More so if you have underlying health conditions of the heart or suffer from hypertension. You should also seek medical advice and refrain from snowboarding if you are experiencing any persistent body aches or headaches.
The reason why people keep going back to snowboarding destinations is that it is not only fun but also quite freeing. With training and the right gear, you will have entire days to explore and possibly even challenge your friends or family to a few races. Of course, the cool sci-fi-looking snowboard goggles and sleek moves are also definitely a plus. What more convincing could you possibly need? Go ahead and sign up for that snowboarding adventure.